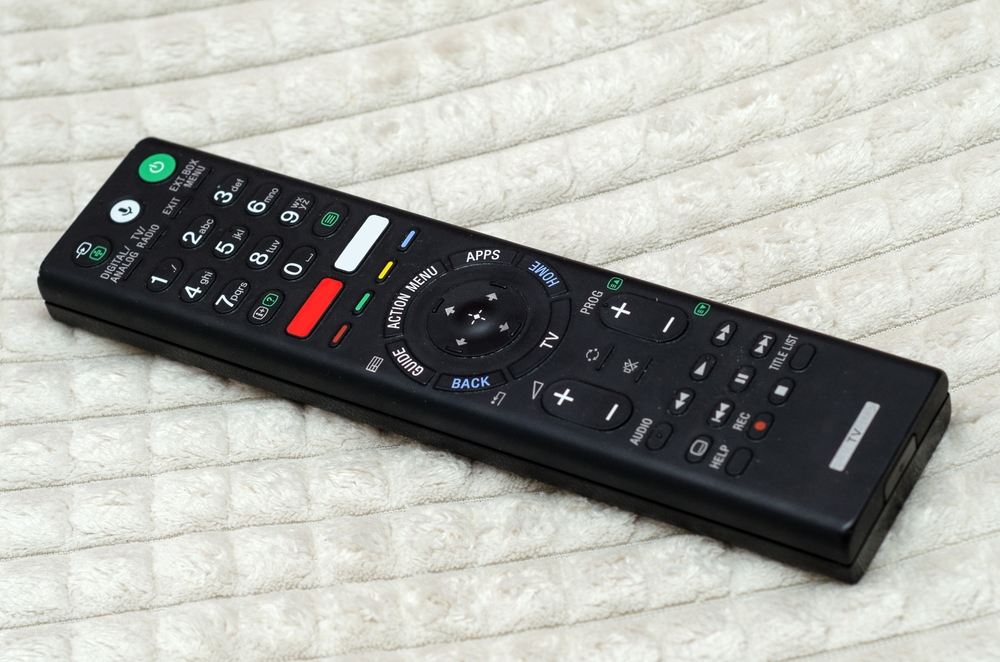
Your TV remote probably gets more use than almost anything else in the living room, yet it is one of those things we rarely remember to clean. Between snack crumbs, oily fingers, dust, and the occasional sticky spill, a remote can become surprisingly grimy.
The good news? You don’t need special cleaning products or a complicated routine. With a few household basics and about five minutes, you can freshen up your remote and get all those buttons looking much cleaner.
What You’ll Need
Before you start, grab:
- A microfiber cloth or soft lint-free cloth
- Cotton swabs
- A small bowl
- 70% isopropyl alcohol
- A soft, dry toothbrush
- A toothpick or wooden pick for stubborn debris
- A few paper towels
The key is to use very little liquid. A TV remote contains electronics, so soaking or spraying cleaner directly onto it is a definite no.
Step 1: Remove the Batteries
Start by taking out the batteries. This is an important safety step because you don’t want moisture or cleaning solution reaching an active power source.
While the battery compartment is open, check for dust or loose debris. Wipe the compartment with a dry cotton swab or cloth. If you notice battery corrosion, don’t simply wipe it around the compartment; it may require more careful cleaning.
Step 2: Shake Out the Crumbs
Turn the remote upside down and gently tap it against your palm. You may be surprised by how much dust and food debris can hide between the buttons.
For stubborn particles around the edges, use a dry, soft toothbrush. Brush gently rather than digging aggressively into the gaps.
Step 3: Make a Simple Cleaning Solution
Pour a small amount of 70% isopropyl alcohol into a bowl.
Don’t pour it directly onto the remote.
Instead, lightly dampen a microfiber cloth or cotton swab with the alcohol. It should feel barely damp, not wet enough to drip.
Isopropyl alcohol is useful for this job because it evaporates relatively quickly and can help cut through the oily residue that builds up from everyday handling.
Step 4: Clean Around Every Button
Now comes the satisfying part.
Run the lightly dampened cloth over the surface of the remote, paying extra attention to frequently used buttons such as the power, volume, channel, navigation, and streaming-service buttons.
For the narrow spaces around individual buttons, use a cotton swab lightly dampened with alcohol. Rotate the swab as you work so you’re lifting grime away rather than simply moving it from one spot to another.
If something is stuck in a tiny gap, gently loosen it with a wooden toothpick. Avoid using anything sharp or metallic that could damage the plastic or electronics.
Step 5: Give the Buttons a Final Wipe
Once you’ve cleaned around the buttons, wipe the entire remote with a clean, dry microfiber cloth.
Check the buttons as you go. If one still feels sticky, repeat the cleaning process with a fresh, barely damp cotton swab rather than adding more liquid.
The goal is controlled cleaning, not soaking.
Don’t Forget the Battery Compartment
The battery compartment can collect dust that often gets overlooked.
Use a dry cotton swab to remove loose dirt. If the contacts look clean and dry, there’s no need to add liquid. If you see signs of corrosion or leaking batteries, stop and deal with that issue separately rather than continuing with normal cleaning.
Let It Dry Before Reinstalling the Batteries
Give the remote a few minutes to air-dry completely. Once you’re certain there is no moisture around the buttons, seams, or battery compartment, put the batteries back in.
Test the buttons one by one. If everything works normally, you’re done.
What You Should Never Do
A few common cleaning habits can cause more harm than good.
Don’t spray cleaner directly onto the remote. Liquid can seep through the button gaps and reach the internal circuit board.
Don’t rinse it under water. Even a waterproof-looking plastic exterior doesn’t mean the electronics inside are water-resistant.
Don’t use excessive alcohol. A lightly dampened cloth or swab is enough.
Don’t scrape aggressively. Scratching the plastic or damaging the button membranes isn’t worth getting one stubborn spot perfectly clean.
Don’t clean it while the batteries are installed. Removing them first gives you an extra layer of protection against accidental electrical damage.
How Often Should You Clean Your Remote?
For most households, a quick wipe every week or two is enough to prevent buildup. If you regularly eat while watching TV or have young children handling the remote, you may want to wipe it down more frequently.
A good habit is to give the remote a quick wipe whenever you clean your coffee table. It takes less than a minute and prevents that stubborn layer of grime from building up in the first place.
The Five-Minute Refresh
A grimy remote doesn’t need an expensive gadget or a cabinet full of cleaning products. Remove the batteries, brush away loose debris, use a tiny amount of isopropyl alcohol on a cloth or cotton swab, and work carefully around the buttons.
Five minutes later, your remote can feel noticeably cleaner, less sticky, and much more pleasant to use. And honestly, once you see how much grime comes off, you may start looking at every other frequently touched object in your living room a little differently.