

Have a pile of old T-shirts sitting in your wardrobe that you no longer wear? Before tossing them out or turning them into cleaning rags, give them a second life with a fun DIY project. You can transform those forgotten shirts into a colorful braided rug that adds personality, warmth, and a handmade touch to your home.
The best part? You don’t need expensive craft supplies, sewing expertise, or an entire afternoon to get started. With a few old T-shirts, scissors, and some basic braiding skills, you can make a small decorative rug in approximately 30 minutes.
Whether you’re looking for a creative weekend activity, a budget-friendly home décor idea, or a simple way to reuse old clothing, this project is worth trying.
Why Make a Rug From Old T-Shirts?
Upcycling clothing is a practical way to reduce textile waste while creating something useful. T-shirts are particularly suitable for this project because their soft, stretchy fabric is comfortable to work with and comes in countless colors.
A homemade braided rug can be used in several ways, including:
- Bedroom décor: Place a small rug beside your bed for a cozy touch.
- Bathroom accent: Use it as a decorative accent in a dry bathroom area.
- Entryway styling: Create a colorful spot for shoes or everyday accessories.
- Kids’ spaces: Make a playful rug using bright, cheerful colors.
- Pet corners: Give your pet a soft resting spot, provided the rug is securely finished and easy to clean.
You also get to customize its size, shape, and color combination instead of settling for whatever is available in stores.
What You’ll Need
One reason this DIY project is so appealing is that the materials are probably already sitting somewhere in your home.
Gather these supplies before getting started:
- 3–5 old cotton or cotton-blend T-shirts
- Sharp fabric scissors
- A measuring tape or ruler
- Needle and strong thread
- Safety pin or fabric clip
- Non-slip rug backing (optional)
- A flat surface for arranging your braids
Choose shirts without large buttons, zippers, or bulky decorations. Different colors can make the finished rug more interesting, while similar shades create a softer, coordinated appearance.
How to Make a Braided T-Shirt Rug in 30 Minutes
Ready to turn those old shirts into something new? Follow these simple steps to create your own mini braided rug.
Step 1: Prepare Your T-Shirts
Start by washing and drying your old T-shirts. This removes dirt and helps prevent unpleasant surprises when you eventually clean your finished rug.
Lay each shirt flat and cut off the sleeves, neckline, and bottom hem. You want to work with the main body fabric because it provides longer, more consistent strips.
Step 2: Cut the Fabric Into Strips
Cut the remaining fabric into strips approximately 1–2 inches wide. The strips don’t need to be perfectly identical, but keeping them relatively consistent will make braiding easier.
Gently stretch each strip lengthwise. Cotton jersey fabric naturally curls inward when stretched, creating soft, rope-like strands that are easier to handle.
If you have shirts in different colors, arrange the strips into three groups. Try mixing light, dark, and bright shades for an interesting pattern.
Step 3: Start Braiding
Take three fabric strips and tie their ends together with a secure knot. You can also stitch the ends together if you prefer a neater starting point.
Secure the knotted end to a stable surface using a clip or safety pin. Begin braiding the three strands just as you would braid hair.
Keep the braid firm but not overly tight. Pulling too hard can make the finished rug curl or become uneven.
When one strip becomes too short, attach another strip by overlapping the ends and stitching them together. For a quick project, a small secure knot can also work, although stitched joins usually create a smoother finish.
Step 4: Shape Your Rug
Once you have a reasonably long braid, start forming the rug.
For a round rug, coil the braid into a spiral, beginning at the center. Keep the coils close together without pulling them too tightly.
For an oval rug, gently stretch the initial coil into an oval shape as you continue wrapping the braid around it.
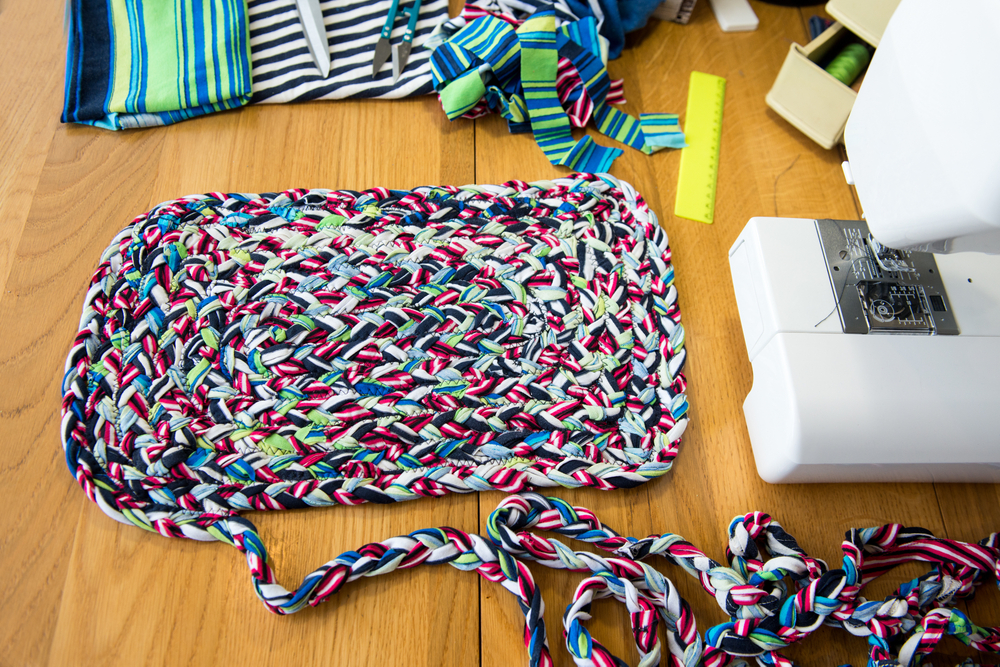
A rectangular version can be made by arranging straight braid sections side by side.
Step 5: Secure the Braids
Use a needle and strong thread to stitch the adjoining braid sections together. Small stitches placed along the edges will help keep everything in position.
Pay extra attention to the center and outer edge because these areas are more likely to loosen with regular use.
Tuck the final fabric ends underneath the rug and secure them with a few stitches. Trim any loose threads or uneven fabric pieces.
Step 6: Add a Non-Slip Finish
If you plan to place your rug on tile, marble, or another slippery surface, consider adding a suitable non-slip rug backing.
This is especially important in homes with young children, older adults, or pets. Avoid using the rug on wet floors, and make sure any backing is compatible with the surface underneath.
Your handmade T-shirt rug is now ready to use!
Creative Ways to Customize Your Rug
Once you understand the basic braiding technique, you can experiment with different designs.
Create a Rainbow Effect: Use strips from different colored T-shirts and arrange them in a gradual color sequence. This works particularly well in children’s bedrooms or play areas.
Try a Neutral Look: Combine white, beige, gray, and brown fabric for a minimalist rug that complements modern interiors.
Make a Striped Pattern: Alternate two or three colors throughout the braid to create a repeating pattern.
Experiment With Different Shapes: Round and oval rugs are beginner-friendly, but rectangular designs can look great in front of a dressing table or beside a sofa.
Use Different Fabric Textures: You can experiment with similar-weight jersey fabrics, but avoid combining extremely thick and thin materials because they may create an uneven surface.
Can You Really Finish It in 30 Minutes?
Yes, but there is a little catch. Thirty minutes is a realistic target for a small decorative rug if your T-shirts are already clean, your strips are prepared, and you work efficiently.
A larger, thicker, or more elaborate rug will naturally require additional time. Sewing every section securely also takes longer than simply arranging the braids.
Here’s a suggested time breakdown:
| Task | Estimated Time |
|---|---|
| Preparing and cutting T-shirts | 7 minutes |
| Stretching and organizing strips | 3 minutes |
| Braiding fabric | 10 minutes |
| Shaping the rug | 5 minutes |
| Securing and finishing | 5 minutes |
| Total | 30 minutes |
Think of this as a quick starter project rather than a promise that every rug size can be completed in half an hour.
Tips to Make Your DIY Rug Last Longer
A little extra attention during construction can make a noticeable difference in the finished product.
- Choose sturdy fabric: Cotton jersey and cotton blends are generally easier to braid and maintain.
- Keep your braids consistent: Uneven braids can create bumps and gaps in the finished rug.
- Secure every connection: Loose fabric joins can unravel with repeated use.
- Avoid overly tight coils: A rug that is pulled too tightly may buckle or curl at the edges.
- Wash carefully: Follow the care instructions for the original fabrics and any backing material. A gentle hand wash is a sensible option for delicate homemade rugs.
- Let it dry completely: Dry the rug thoroughly before placing it on the floor to prevent trapped moisture and unpleasant odors.
Give Your Old Clothes a New Purpose
Turning old T-shirts into a braided rug is a simple reminder that useful home décor doesn’t always require a shopping trip. With a little creativity, forgotten clothes can become something colorful, practical, and personal.
You can make one for your bedroom, create a playful version for your child’s room, or experiment with different color combinations until you find a design you love.
So, the next time you clean out your wardrobe, think twice before throwing away those old T-shirts. Grab your scissors, start braiding, and see what you can create in just 30 minutes!