


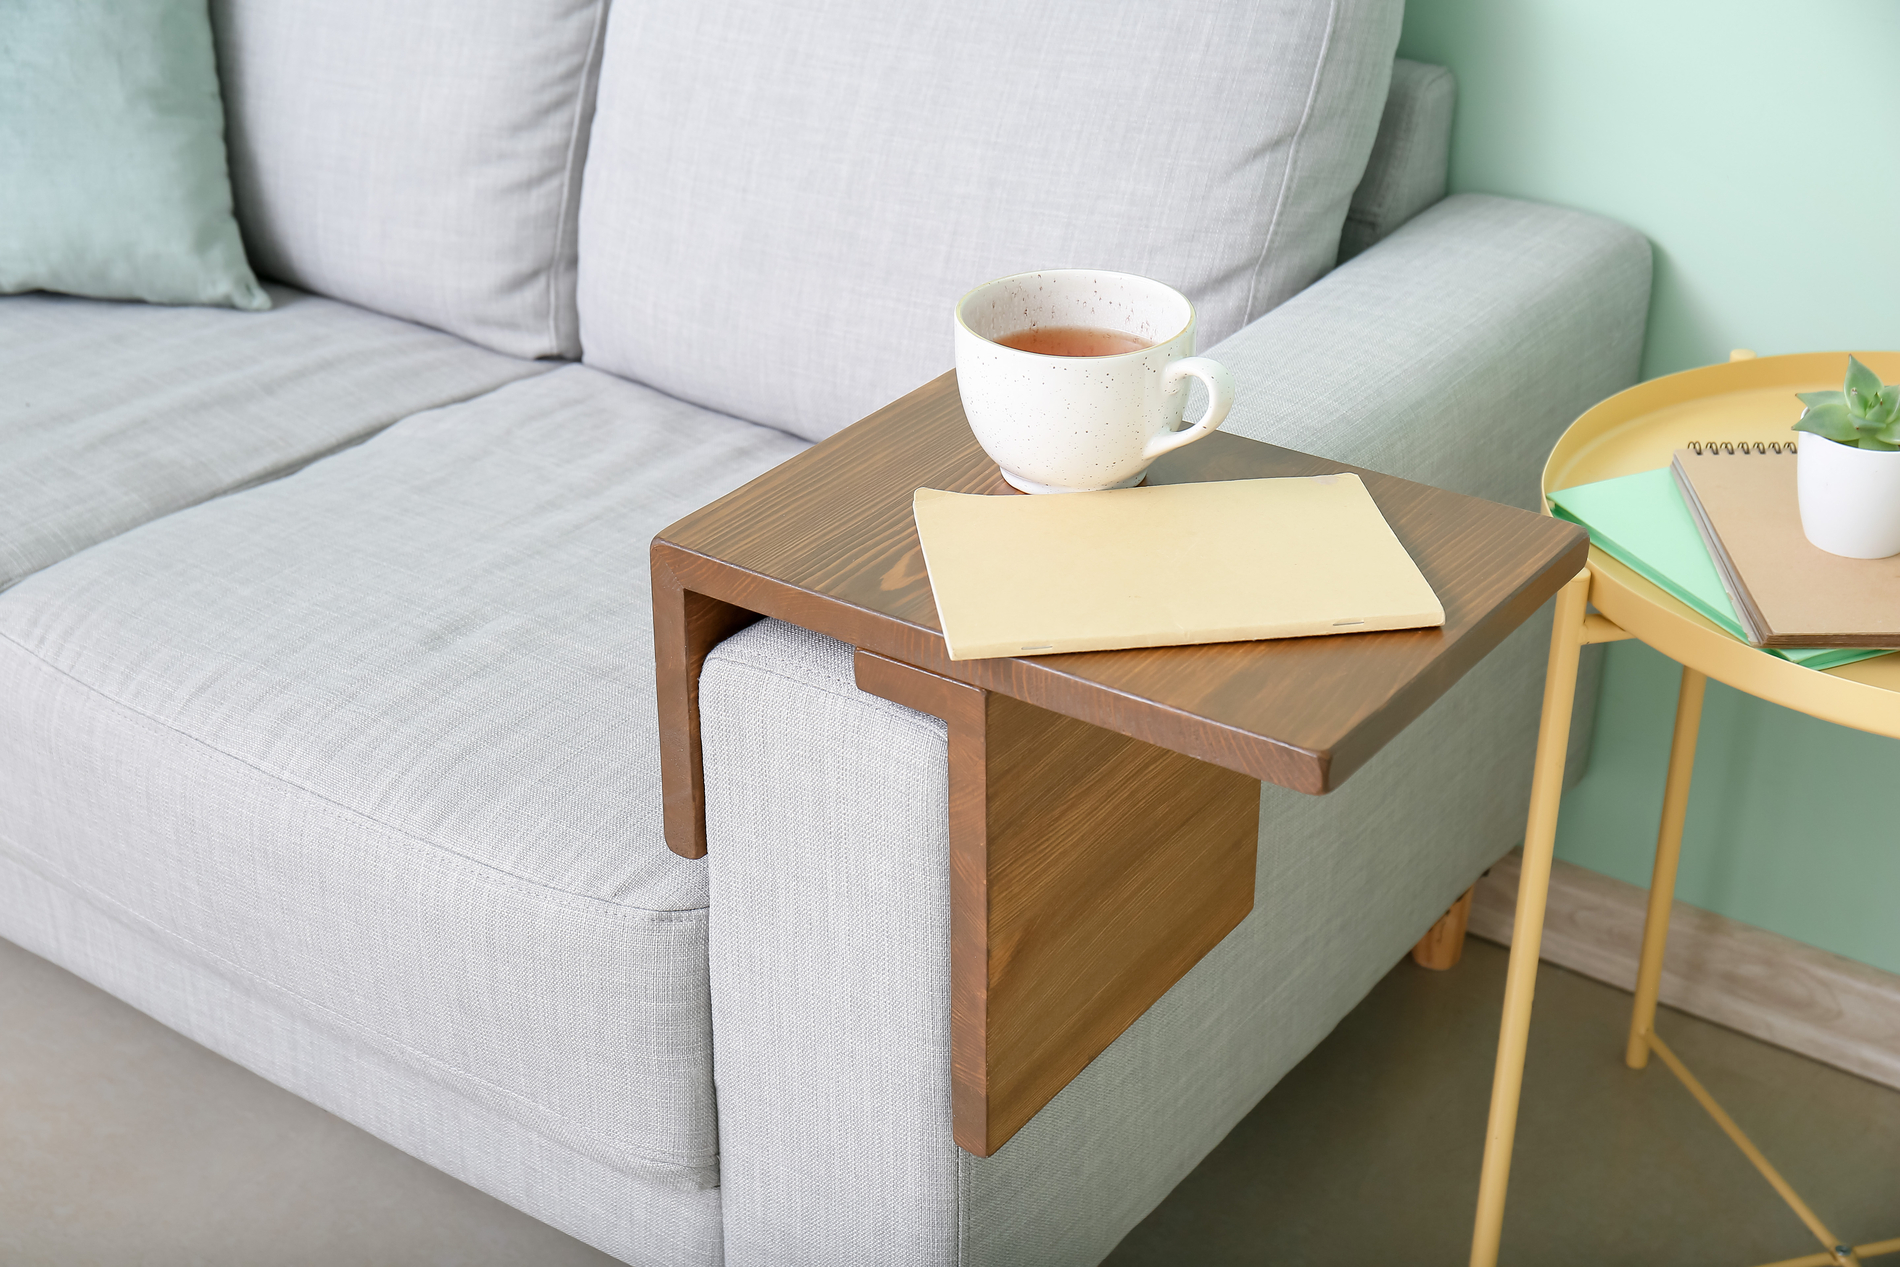
A side table is useful, but not every living room has space for one. If your sofa sits close to a wall or you want your drink, phone, or book within easy reach, a wooden sofa arm tray is a good alternative.
For a basic sofa arm tray, gather:
- A wooden board around 3/4 inch thick
- Measuring tape
- Pencil and ruler
- Saw
- Sandpaper
- Wood glue
- Wood screws or finishing nails
- Drill and drill bits
- Wood stain, paint, or clear finish
- Paintbrush or clean cloth
- Felt pads or thin non-slip material
You can use pine for an inexpensive build, while oak, walnut, or other hardwoods will give the finished tray a more substantial appearance.
1. Measure the Sofa Before Cutting Anything
Start by measuring the width of your sofa arm. Don’t make the tray the same width. Give it a little extra clearance so it can slide on and off without rubbing against the upholstery. Around 1/4 to 1/2 inch of additional space is usually enough.
Next, decide how large you want the tabletop.
A top measuring roughly 12 to 16 inches long works well for a mug, phone, remote control, and a small book. Adjust this depending on the size of your sofa.
You’ll need three pieces:
- One top piece
- One inner side piece
- One outer side piece
The side pieces should extend far enough down the sofa arm to keep the tray stable. About 6 to 10 inches works for many sofas.
2. Cut and Smooth the Wood
Mark your measurements carefully before cutting.
Cut all three pieces, then temporarily hold them around the sofa arm to check the fit. This quick test can save you from assembling a tray that’s either too tight or unnecessarily loose.
Once you’re happy with the dimensions, sand every surface.
Start with medium-grit sandpaper to remove rough areas and finish with a finer grit for a smoother feel. Slightly round the exposed edges and corners as well. Since this tray will sit beside you on the sofa, you don’t want sharp wooden corners to bump into.
Wipe away all the sanding dust before assembly.
3. Turn the Three Boards Into a Tray
Lay the top board upside down on your work surface.
Position the two side pieces underneath it so they form a squared-off U shape. The distance between them should match the clearance you calculated for your sofa arm.
Apply wood glue along the joining edges.
For extra strength, secure each side from the top using wood screws. Pre-drilling the holes will help prevent the timber from splitting.
If you’d rather not see screw heads on the finished tabletop, assemble the tray from underneath with pocket-hole screws or use finishing nails with wood glue.
Check that both side panels sit at 90-degree angles before the glue sets. Allow the joints to dry fully according to the adhesive manufacturer’s instructions.
4. Finish It to Match Your Room
Now your sofa tray should look complete, but finishing the wood makes a big difference.
For a look similar to the pictured example, apply wood stain with a cloth or brush, following the grain. Wipe away excess stain and let it dry before adding another coat for a deeper tone.
For a more contemporary room, you could paint the tray black, white, or another accent color.
A clear protective finish is worth adding, especially if you’re planning to place drinks on the tray. Choose a furniture-safe finish, and let it cure completely before use.
Add One Small Detail Before Using It
Stick felt pads or a thin strip of non-slip material to the inside surfaces that touch the sofa.
This helps protect the upholstery and can stop the tray from shifting when you pick up your drink.
Slide the finished tray over the sofa arm and test its stability before loading it up.
And that’s the project done.
In one weekend, you’ve turned three simple pieces of timber into a compact surface for coffee, snacks, books, and all those remotes that otherwise disappear between the cushions.